In this tutorial we will show you how to setup BatchPhoto manually (without using profiles or projects) for adding comments and time to a set of photos. The tutorial is structured into three sections: Add Photos, Edit Photos and Setup & Process.
Step 1 - Add Photos
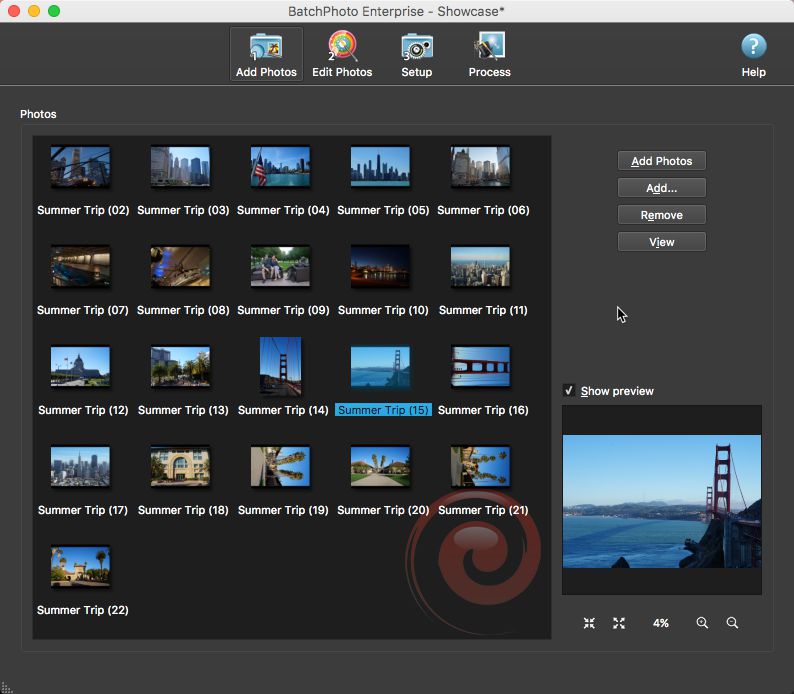
1.Press the Add Photos button and navigate to the desired folder
2.Hold the Ctrl key and left-click on each photo you want processed. Then push the Ok button. Note that the same photo can not be added twice
3.You can refine your list by removing individual photos or even all of them. To remove photos from the list select one or more and select Remove → Selected
4.You are now ready to move to the second step of the wizard. Select the Step 2 - Edit Photos tab
Step 2 - Edit Photos

1.Press the Add Filter button and a dialog box with all available filters will be displayed
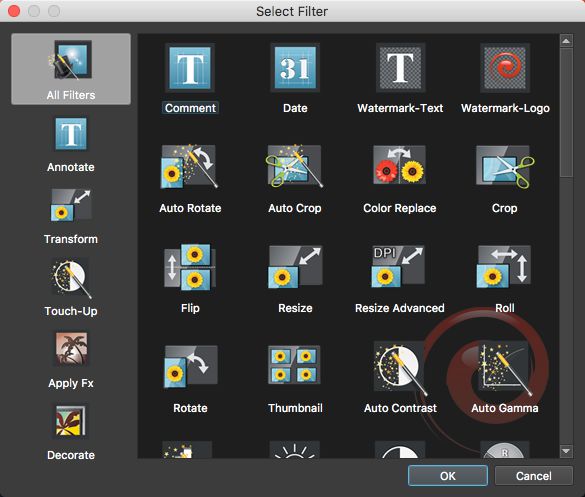
2.Select the Annotate section from the left panel. Select the Comment filter from the list and press OK. A dialog box with the filter settings will be displayed

3.Adjust the Comment filter settings as you like, then press the OK button
•Type your comments into the Comment edit-box. You can also add different keywords to your comment by pressing the Add Keyword button
•To change the comment's alignment within the writing area select the desired alignment from the Alignment combo-box
•To change the comment's position in the resulting photo select the desired placement from the Placement combo-box
•To change the comment's position offset on the X (horizontal) and Y (vertical) axis use the Delta X and Delta Y edit-boxes
•Note that you can also easily adjust the position of the comment in the photo by using drag & drop
•To change the text's font, size and aspect (Bold, Italic, Underline) press the Type button located in the Font section
•To change the text's color, press Color button and select the desired color from the Color dialog
•To change the text's transparency select the desired level from the Alpha combo-box
•The default settings can be restored by pressing the Reset button
4.Repeat steps 1 and 2 to add the Date filter

5.Adjust the Date filter settings as you like, then press the OK button
•You can add either the original photo's date or the current system's date to the resulting photo. Also you can select to add both the date and time or only the date. Make your choice from the Show combo-box
•Select the date format (e.g. MMM-DD-YYYY or YYYY-MMM-DD) and the time format (e.g. AM/PM or 24h) from the Format combo-boxes.
•To choose the date's position in the resulting photo select your option from the Placement combo-box
•To change the date's position offset on the X (horizontal) and Y (vertical) axis use the Delta X and Delta Y edit-boxes
•To change the date's rotation angle use the Rotation edit-box
•Note that you can also easily adjust the position and rotation of the date in the photo by using drag & drop
•To change the text's font, size and aspect (Bold, Italic, Underline) press the Type button located in the Font section
•To change the text's color, press Color button and select the desired color from the Color dialog
•To change the text's transparency select the desired level from the Alpha combo-box
•The default settings can be restored by pressing the Reset button
6.You can now jump to the third step of the wizard or you can continue with the 7th step to modify the output photo's name
7.Modify the output photos' names from the cryptic names given by digital cameras (e.g. "DSC1234.jpg") to meaningful names like "Nature-01.jpg" using the Names filter. For additional information see the Rename section
8.You are now ready to move to the third step of the wizard. Select the Step 3 - Setup tab
Step 3 - Setup
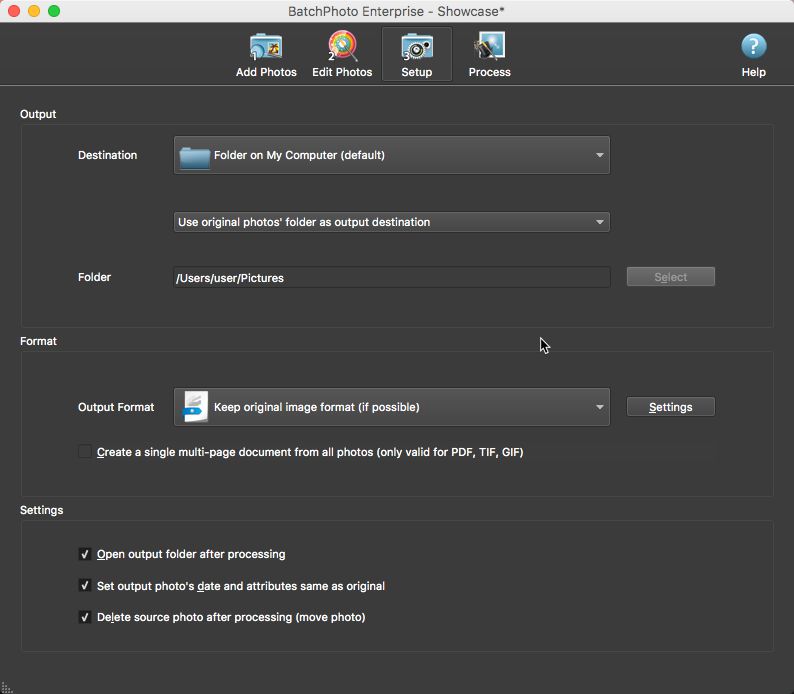
1.Output. The default destination for the processed photos is a folder on your local disk. To select the output folder for the processed photos, choose the Use selected folder as output destination option from the combo-box beneath the Destination and press the Select button. Navigate to the desired output folder then press Ok.
2.Format. As a default BatchPhoto preserves the original format of the pictures that will be processed.
3.Settings. You can select to have the output folder opened in a new Windows Explorer window when the process is finished. The processed photo's attributes (like file date) are left the same (by default) as the originals. You can select to delete the original photos after writing the processed ones if you don't need them any longer
4.Congratulations! You have successfully completed the wizard, all you need to do now is press Process button (top-right). The Processing dialog-box is displayed and all you have left to do now is to wait while the photos are being processed
See also: