
Whether you’re a professional or not, it’s quite likely that, from time to time, you’ll have to edit a group of files. Individual editing is out of the question, because we are talking about dozens or hundreds of photos. So the solution in this particular case is to resort to the Photoshop batch processing feature, designed to automate a large variety of operations.
Watermark and Crop Multiple Photos at Once
In order to edit multiple images simultaneously you have to record an Action, save it and then apply it to your batch of files. These are the steps you need to follow so that you can perform any type of edit, such as for instance cropping or adding a watermark:
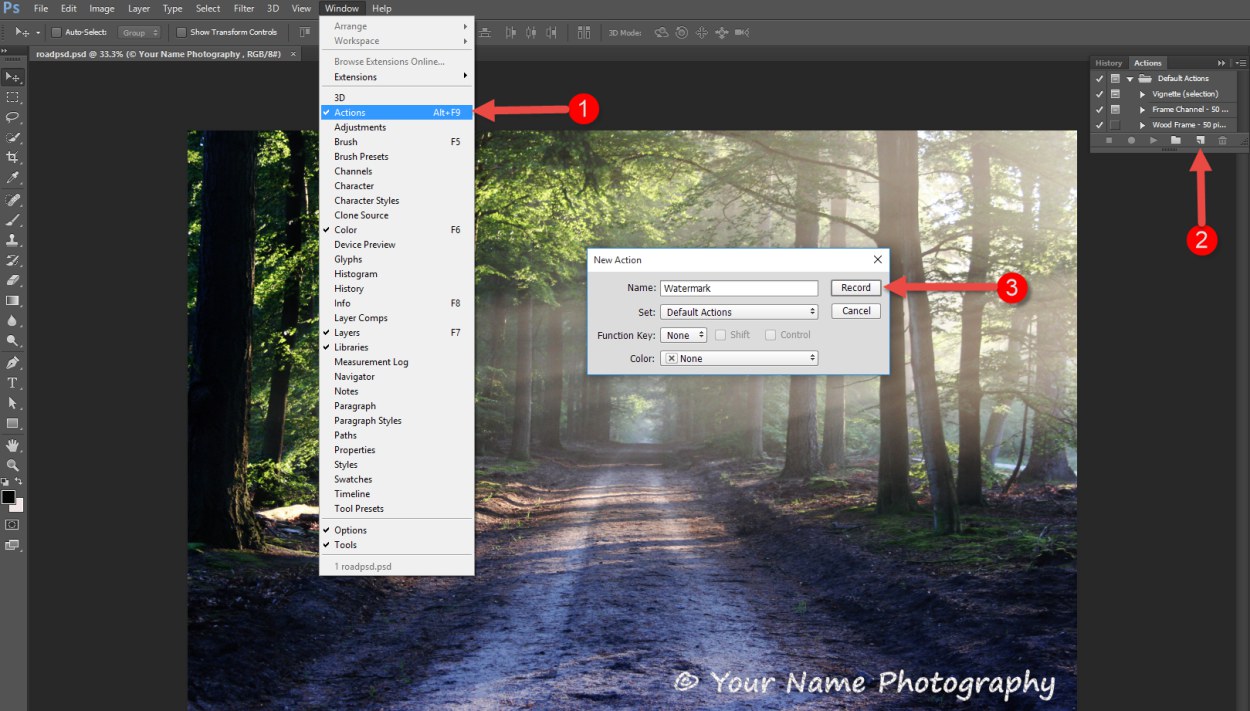
Step 1 – Create a new Action
Once you’ve opened one of the images in the group, you need to create a new Action. You can do this by going to Window > Actions and then by clicking on the “create new action” icon located at the bottom of the Action panel. Once the windows pops up, give it a meaningful name like Watermark or Crop and hit the Record button.
Step 2 – Edit your picture
From here on out every step you take is being recorded until you ask the program to stop. So now you can begin performing all the edits you want, in our particular case cropping the picture or adding a watermark.
Step 3 – Stop recording
Once you’ve performed all the edits you wanted on your image, it’s time to stop recording. You can do this by going to the Actions panel and hitting the square icon that says “stop playing/recording” located on the bottom left side.
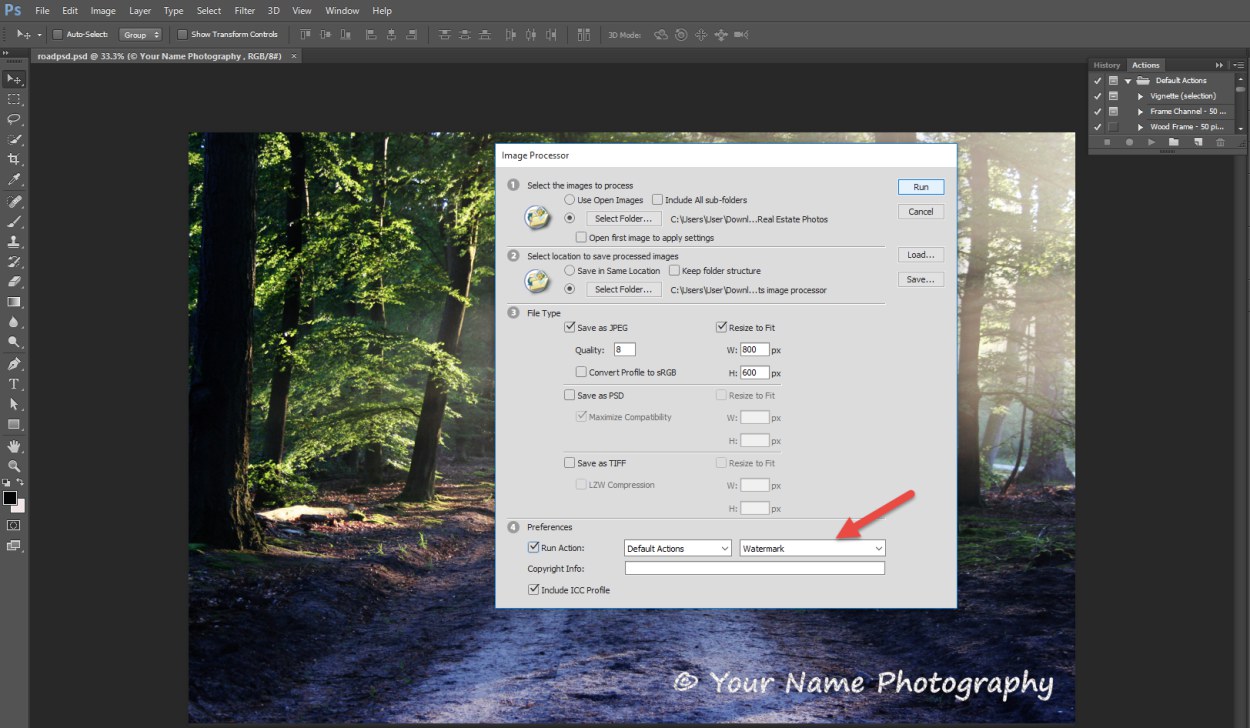
Step 4 – Apply your action to the entire folder
Now you are ready to begin your batch processing. Go to File > Scripts > Image Processor and you’ll see a new window pop up. Here you’ll select the folder that contains the images you want to apply the recorded action to, as well as the output folder where you wish to save the freshly edited photos.
In the Preferences menu check the “Run Action” box , make sure you select the Default Actions set in the first box and the action you created from the second box. Now begin your batch processing by simply hitting the “Run” button.
Batch Resize and Convert Images
Let’s suppose you have an entire folder of photos that you want to optimize for web use. This may mean converting them to a popular image format, as well as reducing their considerable size.
In order to do that you can, of course, follow the steps we’ve previously mentioned: record a resize action, perform all the edits and then apply it to all the pictures. This would be one way of approaching the task, but there is another one available and quite simplified, as it doesn’t require creating an action. Here’s how:
Step 1
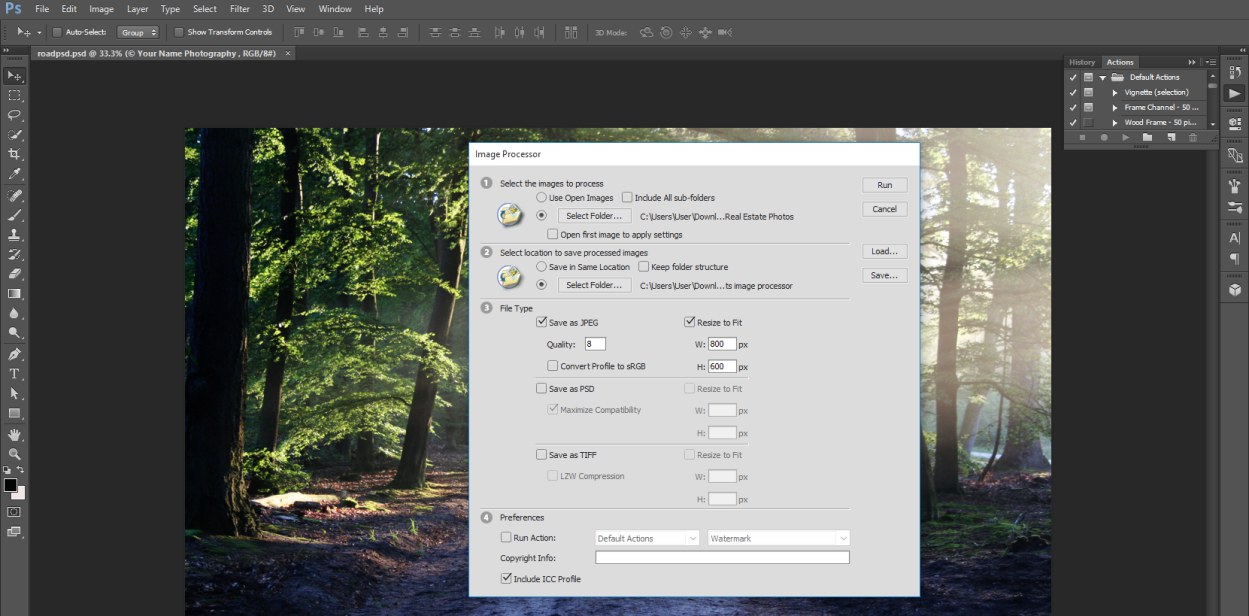
You can open the images you want to edit or not, this part is completely optional. Regardless of what you choose, go to File > Scripts > Image Processor and a new window will open up with 4 sections you need to follow.
Step 2
In the first section of the Image Processor dialog, select the batch of photos you want to apply the edits to. You can do this by clicking on the Select Folder button.

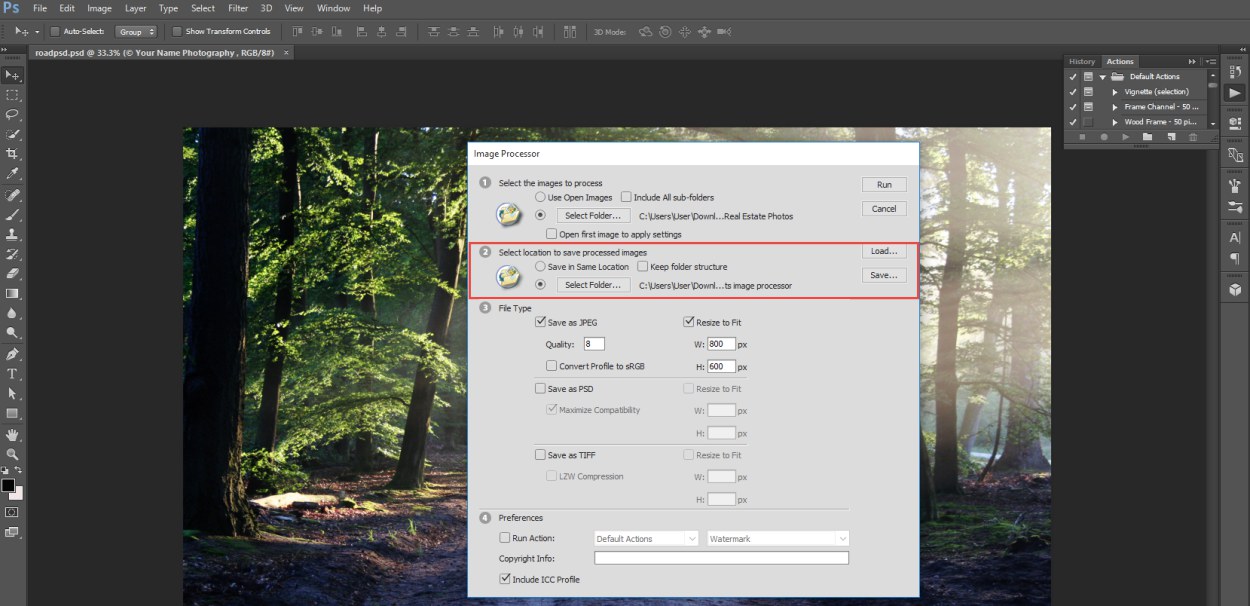
Step 3
In the second section of the window, select where you want your new images to be saved. You can opt to Save in Same Location, in which case Photoshop will automatically create a folder inside your initial folder, or choose a new output folder to save your pictures.
Step 4
In the third section is where you perform all the resizing and converting edits you intended. First you can choose the exact image format you desire by saving as JPEG, PSD or TIFF. The Quality of the image ranges from 0 to 12, but it’s advisable to set it to 8 or higher. Check the Resize to Fit box and enter the new dimensions for the Width and Height in pixels.
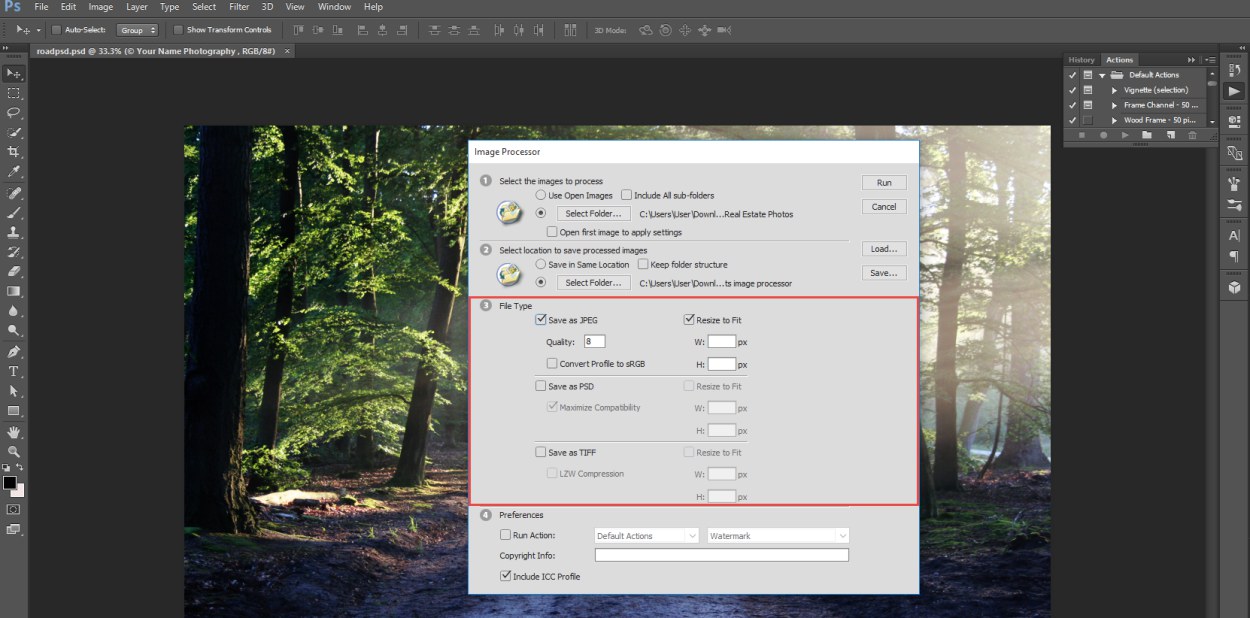
Once everything is properly set and you’ve made sure the check mark of the Run Action is removed in the fourth section, just hit the Run button in the top right corner of the window.